- If dialing
in-country (eg. France to France) omit the + and the country code (33) but do dial the 0 in parentheses.
- If dialing
from out of country but within Europe, eg. (Switz to France) dial 0033
(the + is shorthand for 00) and omit the (0), then the last 9 digits.
- If dialing
from the US or Canada dial 011, country code (33 or 41) omit the (0),
then the last 9 digits.
Using
phones in Europe
Phones in
Europe are really no more complicated than phones in the US or Canada.
There are a few different conventions that you'll want to know. Most European
countries have the same conventions, but there are a few odd-ball variations
that we'll talk about after our initial discussion.
First, if
you are in a hotel, you will need to dial something to get an "outside
line" Often that something is "0" but it can vary. Ask
reception to be sure. In phone booths, or on your own mobile you already
have an outside line so nothing is needed.
If you are
dialing to a number in a different country you need to dial the the country
code. The code for the the USA and Canada is "001". For France
it is "0033" for Switzerland it is "0041", and for
Italy "0039". Often you will see the first two 0s abbreviated
as a "+". For example France's country code might be written
as "+33", or the US as "+1". Just dial "00"
instead of the "+".
European
phone numbers all start with a "0". For example if you are in
Paris, in a phone booth, and are calling our Les Houches home phone (also
in France) you would dial 04 50 21 24 47. Here's another example, if you
are in Geneva, calling the Zermatt tourist office, you would dial 027
966 8100. Basically, when calling to a point in the same country, start
with the "0".
However,
if you are calling to a phone is another country, for example France to
Switzerland, you omit the "0". But you add in the "00 country
code" to start. So calling from Geneva (Switzerland) to our Les Houches
home phone (France) you would dial 0033 4 50 21 24 47. This might be written
as "+33 (0)4 50 21 24 47", with the "+" meaning "00"
and the parenthetical "(0)" indicating that there is an "0"
to dial if you are calling "in-country". If you are calling
from Geneva to the USA or Canada, you would dial 001, then your 10-digit
phone number.
There is
one important exception to the above "omit the '0' rule, and that
is Italy. Even if you are calling from out of country (Switzerland, for
example) you leave in the "0". So calling from Geneva to the
Courmayeur tourist office in Italy you would dial +39 0165 842 060. Also,
some Italian phone numbers have 8 digits, some 9 and others 10. In all
cases leave the "0" in, both when calling from out of country
as well as from within Italy.
Europe uses
a a GSM standard for mobile phones. This is different than the standard
in the US and Canada, and some very old mobile phones from North America won't
work in Europe. However, if you have a GSM compatible phone, they should
function. Be aware, however, that calling from the States to your phone
in Europe can carry some hefty per minute charges. And the roaming charges are often rather high. It is possible to rent mobile phones
for your stay in Europe. Most airports have shops in which you can do
this. It ain't cheap however . Perhaps a better alternative is to buy a cheap "burner" phone in Europe. These really are quite inexpensive and offer "for certain" contact.
Our
address in France:
Kathy
Cosley et Mark Houston
Chalet Altinou
151 Route de Lausenaz
74310 Les Houches
France
ATM cash
machines
We get our
cash from ATM machines. They work as in the US. The only difference is
that the letters correspond to different numbers on the key pad, so
memorize your PIN as numbers, not as letters.
You'll get
Euros in all the Alpine countries except Switzerland, which is holding
onto their venerable Swiss Franc. In October 2019 one Euro (€) was worth
about $1.11 US dollars. The Swiss Franc (CHF) was worth about $1.00 US.
In Switzerland Euros are often accepted, but Swiss francs are more difficult
to use outside of Switzerland.
Credit cards
are usually accepted everywhere with the exception of most of the mountain
huts. Visa and Mastercard are more accepted than others. Most vendors can accept credit cards with the magnetic stripe, but use the chip if possible. Also, Apple Pay and similar are bocoming more and more common, but are not yet universal.
Arriving
in Europe
Most of
the information in this section pertains to arriving in the Geneva airport.
Geneva is your best point of arrival for trips that start in Chamonix.
If your trip begins in another location in Switzerland–Interlaken, for
example–you can arrive in either Geneva or Zurich. Train connections
to other destinations in Switzerland are relatively straightforward from
these airports.
Shuttle,
Geneva to Chamonix
Usually
we take a shuttle service between the Geneva Airport and Chamonix.
There are
a large number of companies that compete in this lucrative business. For all
of these companies, you must book in advance, preferably at least 2
weeks in advance. Virtually all have english speaking drivers (the Brits are the primary
clientele). None have booths at the airport. For any of them, be sure
you have with you an emergency phone number in case there is some confusion
and you need to get in touch with them, for example, you arrive late,
or your ride simply does not show up.
With most
of them, a representative of the service will meet you as you exit customs
in the Geneva airport, or they have specific "locations" within the airport, not far from the exit of customs. When you book your shuttle, you will get instructions on where to meet your driver. Be sure you have these instructions with you. Some shuttles only go to the Chamonix Sud bus station, such as EasyBus, or Ouibus. Others, a bit more expenisive, will drop you wherever you like (normally
your hotel).
Most of
these services cost about 35 Euros for one person, one way in a shared
ride van with dropoff at your hotel. Busses with Cham Sud drop off usually cost between 18 adn 25 €. If you can't get in a shared ride (perhaps you booked too late)
they will also do private shuttles, thought the price is more like 200
Euros. All of them have online booking options.
For a complete list go here.
You can
also take the train from the Geneva Airport to Chamonix, but connections
are complex, the trip takes a while, and you still have to take a taxi
(or walk) to the hotel from the Chamonix train station.
If you are
going to a location in Switzerland, such as Zermatt or Grindelwald from
the Geneva Airport, then the train makes much more sense and is highly
recommended. The Swiss Federal Railways has a great web site wherein you
can view schedules, fares and other info for all trips within Switzerland
and some outside as well: http://www.sbb.ch/en/index.htm
Meeting
in Chamonix
We usually
meet with the group in the late afternoon the day before the trip starts.
Usually this is at our hotel. We'll let you know the exact where and when.
Be sure you have this info with you.
Rentals
in Chamonix
Much ski
gear can be rented in Chamonix. Sanglard Sports usually has a good selection.
They offer a "Haute Route" kit for 7 days, which includes skis,
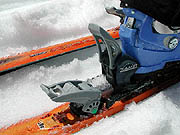
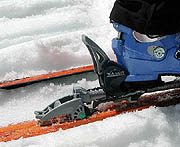
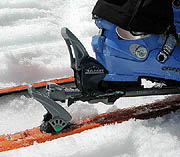
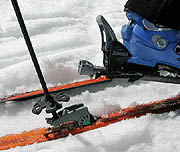
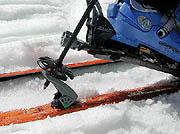
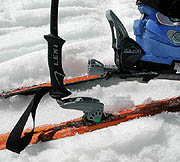
skins, boots, poles, and ski crampons. Most skis are now equipped with a "'tech" (toe pin) binding. If you need ski or boot sizes unusually large
or small, finding gear is harder and you may prefer to purchase gear or
find your particular item in the States before your trip.
Buying gear
in Chamonix is great fun. Selection is wonderful, and prices are typically
less than what you would pay in the States. If you purchase more than 175 € in one store on a single day (and are not an EU resident) you can claim the "detax" tax refund for the 20% value added tax. Getting the forms stamped at the airport on your exit is a bit of a hassle, but if the amount is large, it my be worth it for you.
On most
trips we are available to help you with purchases and rentals the late
afternoon or evening preceding your trip. Please let us know if you need
help with this. Stores usually close at 19:30 (that's 7:30 pm, for
us foreigners).
Out to
eat
We normally
go out to eat with the group after we have discussed gear needs, and what
to expect. Dining out with the group is, of course, optional. It is your
vacation! But we do hope you'll join us.
Equipment
selection
This section
offers a few very general guidelines. For more specific discussions of
equipment selection please see the lists we create for each trip we do.
Skiing with
a light pack (or none) is much more fun, uses less precious energy, and
is safer than skiing with a heavy pack. Do your best to minimize weight.
Here are a few areas you might want to think about:
Crampons
Use aluminum
crampons. Steel weighs nearly twice as much. Some very light crampons
are made by Petzl, Camp or Grivel, as well as other manufacturers.
Ice Axe
If your
trip calls for an ice axe, go light. If we were to buy a ski touring axe
it would have an aluminum head, be about 45 to 50 cm long, and weigh only
a few ounces. For example the Camp XLA210 axs weigh
only about 8 ounces.
If you also
want to use your axe for summer mountaineering where you might have to
climb ice or hard, steep snow with the pick, then a steel head may be
appropriate. But again, go as light as you can.
Pack
About 30
liters is the right size. Avoid packs larger than about 40 liters. A big
pack carries poorly, impacts your skiing more and saps energy. You should
be able to find a good pack of the correct size that weighs no more than
about 2 pounds.
"Extras"
Try to avoid
bringing a lot of extras. Food can be purchased in the huts. While skiing
we can usually stay quite warm. The huts are warm.
Skiing
with a guide
Skiing with
a guide is (or should be) a lot of fun. A few things are a bit different
than tearing it up at the local area with your buddies, and we thought
it might be helpful to discuss a few of them here.
Guide's
job
The guide's
job is basically to help you have fun and to help you avoid the many hazards
of the wild mountain environment. Usually these two things don't get in
the way of each other. In fact, with the guide watching out for problems
such as avalanches or crevasses, you can relax a bit more and concentrate
on the fun part.
Fun
The guide
looks for the best snow and the best skiing within the constraints of
managing risk. In a group of varying abilities what defines the "best
skiing" will vary from skier to skier. When we have a varied group
we will often give more options for the better skiers, while helping those
not so skilled find easy-to-ski lines. Hopefully we can make everyone
happy.
Safety
The guide
also must help you to manage risk. One of the main ways they do this is
to control where the group skis and how they ski a particular pitch. When
it matters, the guide will use techniques that increase their control.
Where hazard is minimal, the guide will ease up on the reins a bit. But
group control, and the guide's ability to maintain it, is a central need
of the guide for risk management. There are a few things worth mentioning.
Understanding
what the guide says
The guide
may give instructions about how they want you to ski a particular pitch,
or where they want folks to go, or not go. Be sure you understand these
instructions! Speak up if you don't. Keep a constant ear out for critical
info, and where you hear it, pay attention.
Rules
There are
only a few "rules" you need to follow;
Listen
Listen to
your guide when they give instructions.
Understand
Understand
those instructions, and follow them.
Take
responsibility for yourself
The guide
cannot fully control how or where you ski, even though they may try. You
need to help the guide by skiing in control and keeping an eye out for
hazards. This is particularly important with crevasses!
Normally
the guide goes first
Most of
the time the guide will ski first. They need to do this to check out hazards
and snow conditions. Usually you can ski a few turns behind one another.
If you are following the guide, be prepared to stop suddenly and unexpectedly
as the guide may need to stop as hazards and obstacles appear. Give the
guide at least 30 feet of space. Sometimes, the guide may choose to go
last, giving the guests first tracks. This happens more frequently on
non-glaciated terrain, and rarely in crevassed areas.
Don't
ski below the guide
If there
is one rule above all, Don't ski below the
guide! Stop above the guide, close by. The reason is that
the guide may stop just short of a hazard, a hidden crevasse, for example.
Skiing past the guide, or below, exposes you to that hazard.
One skier
at a time, but only occasionally
Occasionally
we prefer to ski a slope one skier at a time. Usually this is in response
to avalanche hazard where we want to avoid loading the slope with a group
of skiers or exposing more than one of us at a time to the hazard. We'll
let you know when this is the case.
Signals
We often
use signals to indicate when we want you to ski, if you should stop, or
keep to the right or left.
Occasionally
the guide will want to ski a slope first, to check it out, before the
group skis it. When the guide reaches the bottom he or she will indicate
that it is OK to come down with a wave of a ski pole overhead in a circular
motion. If the guide has asked the group to ski one at a time he will
indicate that the next skier can start with this same motion.
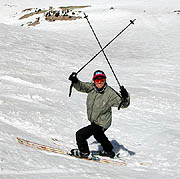
When the
guide crosses poles overhead, stop immediately and wait for instructions
or a signal to continue.
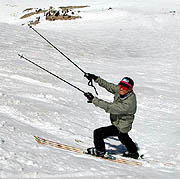
If the guide
wants you to keep to either the right or left (facing downhill) the guide
will hold the poles overhead, indicating this with a right angle facing
either to your right or left.
Guides
use "tools" to control a group
The guide
uses various management strategies to control the skiing group. One such
strategy is to ski either the far right or far left line, establishing a "fence"
on the run. The guide will say "stay to the right (or left) of my
tracks". When he says this, do not cross his tracks, even for half
a turn!
Another
strategy is to do a gentle traverse at the end of a pitch. This forces
all skiers to traverse above or in his tracks. He will do this to avoid
a hazard. Skiing below the tracks will expose you to the hazard. Because
of the traverse and the need to end up no lower than the guide (remember
the rule above) you'll end up staying clear of the hazard.
There are
other tools and tricks as well. The main thing is to listen and understand
the guide's instructions. Most of the time things are obvious and you'll
feel completely free to ski as you please. But at other times, particularly
in crevassed or avalanche terrain, the guide may be quite picky.
Using
the rope
Sometimes
the guide will want to belay steep sections. He'll let you know. You might
ski these sections with a belay from above, side-slip, or even be lowered.
At other
times the guide may wish to tie in to you, quite close. They will do this
to help protect you on steep, typically traversing terrain. Also, when
we are on foot, and the ground is steep or icy, we may rope up.
Any time
we are traveling on a crevassed glacier, and we don't have our skis on,
we almost always will rope up. Walking around unroped on a crevassed glacier
with bare boots is not recommended.
If you would
like to be belayed or have the guide tie in, please say so. Usually we
belay where you are likely to want a belay. But sometimes the psychological
security of being roped up, helps to relax and enjoy the skiing.
Skiing
in crevassed terrain
Skiing in
heavily crevassed terrain is one of the most exhilarating and hazardous
parts of Alpine touring. Group control is critical.
Ski in
control
Loss of
control and skiing into an open crevasse is all too common. When there
are holes about, take it easy!
Follow
the guides line
Pay close
attention to where the guide skis. Ski where and how they ski.
Cross
crevasses at right angles
Occasionally
crevasses need to be crossed. The safest way is to ski straight across
them with the skis at right angles to the crevasse. The guide will ski
this way or ask you to if necessary. Ski in the guide's tracks.
Taking
breaks on the glacier
Often our
breaks will occur on crevassed glaciers. (Much of the ski touring in the
Alps is in such terrain.) At these times, try to avoid walking around
without skis on. Skis greatly decrease the odds of popping into a hole.
If you need to walk a short ways from the group to use the "WC"
or to get a good angle for a photo, keep your skis on. If there are crevasses
nearby, ask the guide if wandering a short way is OK, before you take
off.
Keep
and eye out for hazards
Even though
guides are trained to see crevasses and are sensitive to their subtle
signs, we can't see them all. You, too, need to watch out. Be especially
wary of depressions in the snow, especially so if they run parallel to
other visible slots. Do not stop or turn in or on these depressions.
Equipment
for the day
Most days
are similar to one another. Gear needs don't change much. Here are a few
gear comments that might help you to prepare.
Avalanche
Beacons
Whenever
we ski the backcountry, we wear transceivers. They should be worn under
your outer layers or in a secure zipped and dedicated pocket. We usually
put them on as we get dressed for the day. Most often we wear them just
over our thinnest layer of synthetic lightweight underwear. If possible
avoid wearing them on the outside of your clothing.
Turn them
on when you put them on, and leave them on all day.
We'll do
a check at the start of every day, and occasionally in the course of the
day. But you need to be sure yours is worn properly, turned on and that
the batteries are OK. Alert your guide if the battery level indicator
shows less than 25%.
Harnesses
Much of
the high alpine touring in the Alps is on glaciers. We always wear harnesses
when skiing on a glacier. Harnesses greatly simplify roping up and even
crevasse extraction if it should come to that. On the Haute Route, for
example, there is only one day of skiing where you can delay putting on
the harness until later in the day. On all other days the harness goes
on first thing and is worn all day. Assume that we want everyone to wear
their harness from the start. We'll let you know if this is not the case.
Packing
your pack
There really
is not much in your pack, so packing is easy. Here, however, are a few
tips.
Seldom
used items on bottom
There are
a few things you are not likely to need much and can be stowed at the
bottom of your pack. For us, these include our wind pants, our first aid
materials, extra food (not much of this), our warmest layer, extra socks,
a "hut shirt", boot crampons, and a few other odds and ends.
Heavy items, such as water and lunch should be carried close to your back.
Shovel/crampons
inside
We always
carry our boot crampons inside our pack, in a nylon protective bag. We
also carry our shovels, shovel handles and avalanche probes inside our
packs. The only thing strapped to the outside of the pack is the ice axe.
And in fact, we sometimes pack even this inside the pack.
Skins
and ski crampons
Keep these
handy, fairly close to the top of your pack.
Téléphérique
etiquette
There is
an established etiquette for behavior on téléphériques.
They are often crowded and good behavior helps us all to get along in
these very packed confines.
You may
need to readjust your notion of "personal space". To queue up
in crowded conditions means to allow yourself to enter a stream of bodies
and be carried along with it. It is not always an orderly process, but
ultimately it works. Try not to hold things up, but also not to shove
ahead of others. Most of all, try to keep your cool, knowing that you
will get to your destination and a bit of crowding is worth not climbing
thousands of meters of elevation.
Packs
off
As you get
in the cabin, put your pack down. You want it on the floor. If the lift
is going to be very packed, consider buckling your waist belt buckle around
your pack to help keep it out from underfoot.
Be careful
with your ice axe
When we
expect a ride on a téléphérique, we try to pack our
axe inside the pack, or at a minimum keep the pointy parts tucked out
of the way and safe from the damaging effects of human flesh.
Crampons
inside pack
As stated
above, crampons should be inside the pack. We have light, little crampon
bags to protect the other things in our packs.
Getting
on the lift
As we get
in line for the lift, we get partitioned into groups of however many folks
can fit on the lift at one time. So when it finally comes time to board,
everyone in the group will get on. There is no need to rush to be sure
there is room. On a crowded lift you will often see the guides and ski
instructors hold back to be the last on, backing their way in. It may
be tight, but relax, everyone is in the same boat.
Touring
Tips
Touring
is really very much like walking. There are a few differences however,
and we'll discuss them below.
Uphill
Spacing
While skinning
uphill, we naturally tend to clump up. This is fine, makes for a social
occasion and helps us all to keep track of one another, and maintain a
relaxed and comfortable pace.
We like
to stay close enough together so that we can communicate if necessary
with the group and so no one feels left behind. But we all like our freedom
too, and sometimes you may like a bit of separation. This is fine. If
the guide wants to convey important info or keep the group together, they
will wait for everyone to catch up.
Don't
kick the ski tails of those ahead of you
One thing
to avoid is being too close to the person in front of you, and hitting
the tails of their skis with the tips of yours. Keep about a meter or
two between tips and tails. Frequent tip-tail contact is a bit like the person in the airline seat behind you tapping on the back of your seat.
Keep
in sight
As we mentioned
above, we like to keep everyone in sight of the guide. If you need to
stop for a moment to take a photo, just step out of line to let others
pass. For a longer stop, such as a significant water or clothing change
let the guide know and he or she can plan a good stopping point. We prefer
to stop in level, crevasse free areas with good views. Sometimes we need
to make an equipment transition, such as putting on ski crampons, and
we will often target our stops to coincide with such changes. This may
require that you wait a few minutes, or plan ahead to anticipate such
needs.
Blisters
and hot spots
Ski touring
can be hard on the feet. Blisters and boot bang (on the shin) are not
uncommon, especially with new or rental boots. As they say, "an ounce
of prevention is worth a pound of cure". Deal with potential problems
early and you can avoid them later.
We recommend
you carry a bit of tape, some moleskin as well as some of the new-fangled
blister remedies such as Spenco Second Skin or Compeed.
Trail
etiquette
There are
lots of skiers in the Alps and often we'll be sharing the "road"
with others. Even within our own group it is polite to follow a few simple
suggestions.
- Avoid
tailgating, where the tips of your skis occasionally hit the tails of
the skis in front of you. Put about a meter or so between your tips
and the their tails.
- When
we stop for breaks we should step completely off the trail so that others
can pass easily.
- If you
stop for more than a few seconds step to the side so that whoever is
behind you can pass.
- Normally,
if another party is going a bit faster than ours, the convention is
that they need to go around ours. The slower party can stay in the track,
going their slow pace. There is no expectation that the slow party should
step out of the track to let the faster party go by. But again, if you
need to stop, step aside.
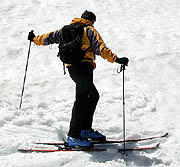
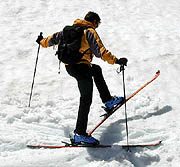
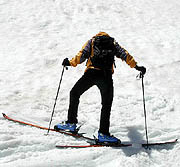
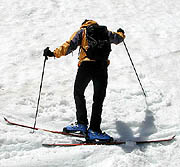
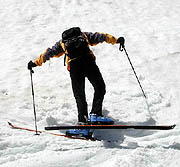
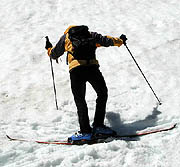
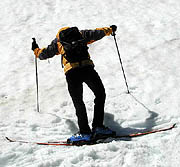
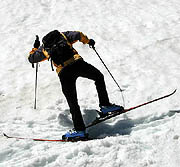
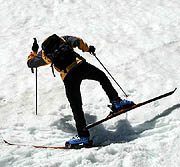
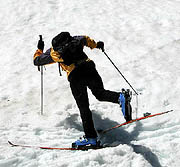
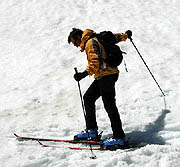
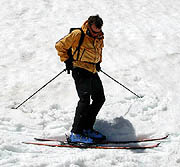
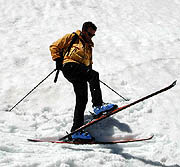
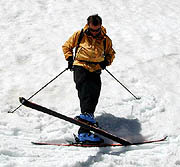
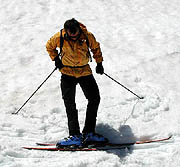
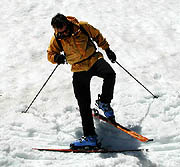
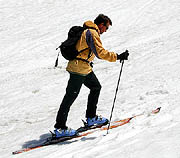
Kick
turns
Kick turns
are common when touring in steep terrain. Though we try to make rounded
walk-through turns when we can, we sometimes need to zigzag up a steep
slope, using kick turns at the corners.
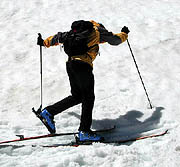
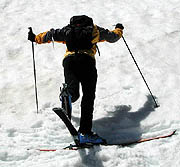
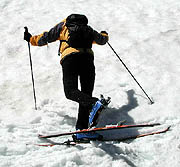
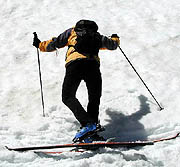
There are
three kinds of kick turns we use.
Regular
uphill kickturn
This is
the most common for going uphill, and is the one you are most likely to
be familiar with. Here are a few helpful pointers;
At the corner,
move your skis into a level position, perpendicular to the fall-line,
before you start your turn.
Pick up
your uphill ski and turn it to the new direction. Try to get your feet
fairly close together, with the ski more or less flat across the slope.
A bit of flexibility is needed here. In soft snow, you may be able to
bury the tail of the uphill ski underneath the downhill ski, making it
easier to get the skis close together.
Once you
have the uphill ski in position, and can balance on it, pick up the downhill
ski and "clack" the heel to bring the tip in close to you. Do
this by tapping your heel on the ski. This pushes the tail down and brings
the tip up. You need to do the "clack" with your foot behind
you and your ski still pointing in the original direction. The "clack"
is much harder in tele gear. Tele skiers should set their bindings more
for a "touring mode" (easy heel lift) and less for a downhill
mode (harder heel lift).
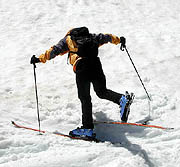
Upside-down
turn
The "upside-down
kick turn" as we call it is a variation of the regular kick turn
described above. Like the regular turn it is used when going uphill, and
like the regular turn you face into the hill.
The upside
down turn is useful on very steep slopes, or when there is an obstacle
above you at the turn, which makes it hard to get that first ski around
in the new direction. Sometimes the snow above you is just such an obstacle
This is
a great turn in tricky terrain and one that is worth learning. It is relatively
little known among American ski tourers.
Start the
upside down turn by leveling the skis on the turn platform. Step far to
the inside of the platform.
Lift the
uphill ski and swing it back, behind you, turning it 180¡ into the new
direction, and place it below your other ski. Transfer weight to your
new downhill ski, the one pointing in the new direction.
Pick up
your uphill ski, clear the tail past your other boot, then "clack"
and follow through as per the regular kick turn. Practice this one at
home a few times, in order to get the movements down.
Downhill
kickturn
The downhill
kickturn is used when going downhill and you want to change directions.
This one is fairly intuitive and most skiers know it. A couple of comments;
Because you are skiing downhill, you are most likely to not have skins
on. Skinless skis are slippery. Be sure your skis are level before starting
this turn.
Some skiers
use a downhill kickturn when trying to go uphill on steep slopes. We feel
it is far better to learn and use the upside down kickturn in such a situation
than the downhill turn. Facing out on a steep slope, as the downhill turn
requires, is discomforting and often leads to slips. Facing into the slope
is easier, at least once you have mastered the upside down turn. Learn
to use the best technique for the job at hand.
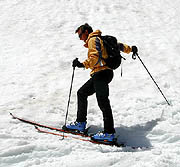
Poling
We spend
a fair bit of time walking along in skins, often on gentle ground. Efficient
use of your ski poles helps to propel you along, saves significant amounts
of energy, and shows you are an experienced and skilled ski tourer.
Wrist
straps
Over the
years, we have pretty much stopped using our wrist straps, both for the
uphills and the downhills. Even when we downhill ski at Mammoth Mountain,
our local area, we don't bother with our straps. There are a number of
reasons for this.
Traverses
On uphill
traverses (our most common uphill position) we choke up on the uphill
pole holding it by the shaft below the handle. The lower hand and arm
position is more comfortable, restful and gets better blood supply to
the hand. Obviously we can't use the strap in this position. Also, on
the downhill pole we often put our hand over the top, again a position
in which the strap is useless.
Faster
with no straps
When zigzagging
up a slope where we are likely to want to choke up on the uphill pole,
with every turn the wrist strap user needs to take one hand out and put
the other in. Though this may not seem like much, it happens many, many
times each day. It adds up. Also, for every stop or adjustment the strap
user needs just a few more seconds to do whatever they're doing. Once
you stop using straps, you'll notice the difference. With no straps you'll
enjoy a strong sense of freedom.
Tree skiing
Whenever
we ski in the trees, we make a point of not using straps. This is a safety
consideration, greatly reducing the chance of a shoulder injury when a
basket snags on a snag. Whether or not you normally use straps when you
tour, you should avoid them in the trees. Many Canadian heliski operations
give out poles with no straps at all, avoiding even the possibility that
someone might use them in the trees.
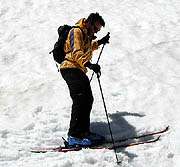
Walking
uphill
Arms close
to side
When walking
uphill in skins keep your arms and hands fairly close to your sides. Avoid
using arms wide, like outriggers for balance.
Arms near
straight
When you
reach forward for a pole plant your arms should be more straight than
bent. Watch your arms as you pole, if they are as bent as 90¡ you are
not maximizing your efficiency. Try to keep them a bit straighter.
Poles
tilted forward
With your
arms straightish your poles will naturally tilt forward a bit. This is
good. That forward tilt directs the pressure you put on them behind you,
as opposed to straight down into the snow. This propels you forward, directing
your energies to moving uphill, not side to side.
The baskets
of the ski poles should plant near the middle of your back foot, no further
forward than this. You'll see what I mean if you take a few steps. With
arms more straight and baskets back, the poles tilt forward, a good combination
for efficient walking.
Heel
lift
When skiing
uphill, we occasionally use our heel lifts to ease the strain on our calves
and to maintain a more neutral and comfortable position in our boots.
Most ski bindings have a number of different positions of lift. We can
adjust this to suit the steepness of the track.
Most folks
are quick to raise their heel, but often slow to lower them once the angle
of the track decreases. Be sensitive to the slope and don't hesitate to
lower them as angle decreases.
Be quick
and efficient
Learn to
adjust your heel lift quickly. If one person stops in front of you for
a height adjustment, you might as well take advantage of the pause to
alter your own in anticipation of the change in slope.
Heel
lift on steep traverses
On a steep
traverse with firm snow, we often have to let our knees move to the outside
to maintain skin contact with the snow. Heel lift makes this more difficult.
Keep the heels low in these conditions
Using
ski crampons with heel lift
With the
Fritschi Diamir or the Silvretta bindings the crampons come up off the
snow when you raise your heel. Because of this you get minimal crampon
penetration when you are using heel lifts. When on steep hard snow, consider
lowering your heel lifts to improve crampon contact.
Rounded
turns
When turning
corners, we prefer to avoid kickturns and instead use rounded walking
turns. If the slope has much of an angle you'll need to keep your skins
flat on the snow in order to increase their grip. Stand square in the
center of the ski, and step with a bit of aggression. A gentle stomp may
help. The main thing, however is to keep the skis flat.
Traversing
with skins
In hard
snow we need to be careful to keep the skins on the snow. Try to avoid
standing on your edges, as there is little skin there. You'll need to
experiment a bit, balancing the need for edge engagement to keep from
sliding sideways, with the need to keep the skins on the snow to prevent
backwards sliding. Ski crampons may help in these situations.
Hut
living
One of the
main attractions of ski touring in the Alps are the huts. They enable
us to wander through the big mountains with only light packs, covering
lots of ground, and enjoying the great downhill sections. In fine weather
the huts can be quite busy, and living in such close proximity to others
can be a bit trying. If you know the ins and outs of hut living, the whole
thing is a bit less mysterious, and easier to manage.
Hut guardians
have a tough job. They have to cook, clean, check in and check out a new
crop of tired (but happy) skiers every day. There are certain "rules"
and procedures that make their job easier for them. Understanding these
improves international relations and makes our stay more pleasant.
Arriving
at the hut
Storing
the skis and poles
Almost always
the skis and poles are left outside the hut. Keep them all together to
prevent loss. Stow them in such a way that the wind can't blow them over
or, even worse, down the hill. Some huts, especially the Dix and Vignettes
huts are very exposed to strong winds. Generally you will want to take
your skins off your skis, especially if it is windy. Put your ski bases
together, pole straps around both skis and place them in a secure spot.
In the
foyer
Huts have
a foyer in which you can get suited up if the weather outside is poor,
and also to store certain items that the hut keepers don't want inside.
Leave your boot shells and you ice axe in the foyer. Place your boot shells
low on the rack, so melting snow won't drip into another person's boots.
Also watch that another's boots don't drip on yours. We usually bring
boot liners into the warmer part of the hut to dry. If your boot crampons
are on the outside of your pack, take them off and leave them with your
ice axe. If you keep your crampons inside your pack, in a protective sack,
it is OK to bring them into the hut.
Hut shoes
Find a pair
of hut shoes that more or less fit you and change into these (the huts
supply them). You can wear your boot liners inside the hut, but we prefer
to try and dry them out.
In the morning
you may see skiers putting their boots on inside the hut. This is generally
considered OK. But at any other time of day, avoid wearing your boot shells
in the hut. They are never permitted in the dormitory rooms. Leave them
in the foyer.
Beacons
off
Once inside
the hut you can turn your avalanche beacon off and bring it inside with
you. Be sure not to misplace it.
Storage
baskets
Most huts
have little storage baskets you can use to help keep track of and organize
your gear. Look around and see if you can find one. If the hut is busy,
limit yourself to one basket, leaving some for other skiers. The baskets
can be carried into the dorm rooms or kept in the main dining room.
In general,
we try to keep our gear confined to one basket and our packs. In most
huts we can take our packs up to the dorm rooms and place them by our
bunks. Remember ice axes and crampons must be ether hidden deep within
your pack or left in the foyer.
Hanging
gear up to dry
Folks often
hang stuff up to dry, usually in the main dining room, which is often
heated. Boot liners, skins, and other articles of clothing can be seen
hanging from many places. Try not to get too spread out or to hog too
much space. Keep track of what you hang up so you don't lose it. Label
your gear with markers before you leave home.
Assigning
of bunks
Your guide
will check in with the guardian. The guardian will assign bunks to everyone.
If we arrive early at the hut, they may not be ready to assign bunks,
and we'll need to wait a bit.
We'll be
assigned a room and everyone a bunk number. Once we receive our assignments
we like to put an article of clothing on our bunk and perhaps spread out
the blankets a bit, indicating that the spot is occupied. This decreases
the chance that someone will "borrow" your blankets or your
pillow, or encroach on your personal space.
Keep your
pack near your bunk. You can use your bunk space to help you organize.
Getting
organized
You'll need
to organize your gear a bit. We often put on out "hut shirt"
getting out of our damp and smelly "touring shirt". We hang
up wet gear to dry, and we pull out of our pack whatever gear we need
for our night's stay. This is the stuff we want to have handy in the evening.
Usually this includes;
- Any clothes
we need (to go outside to the WC if necessary)
- A headlamp
- Our thermos
or water bottle
- Maps
or other reading material
- Our earplugs
for the night
- Money
for drinks and snacks
- And whatever
else you feel you need.
Quiet
and lights in sleeping rooms
In the afternoon
and evening, and especially at bed time, folks will be trying to sleep
in the dorm rooms. Try to be quiet if anyone is resting in the room. Keep
talk to a minimum. Avoid using the room lights if possible—use your
headlamp and avoid shining it in sleeper's eyes. Minimize thrashing around
in your pack or fiddling with gear.
If you are
trying to nap or sleep and folks are talking loudly, it is OK to "shhhhhh"
them, especially between 10 pm and the wake-up hour.
Paying
for drinks and extra food
Normally
your guide will pay for the fixed dinner and breakfast, as well as your
overnight stay. For other menu items and all drinks you'll need to pay
for these yourself. You can most easily do this at the time you order
your drinks.
Sometimes
we may run a tab, usually in the guides name. Tabs are paid when we pay
up for meals and lodging, normally just after dinner. If we use a tab,
keep track of what you order. Generally it is easier if everyone pays
for things as they order them.
All of the
bottled drinks in the huts, as well as the food, are flown in by helicopter.
This makes them rather expensive. A liter and a half bottle of water can
cost as much as $10 US, so if you like to buy bottled water be prepared.
Tea, which the hut keepers melt from nearby snow is much cheaper. You
can also order bottles of hot water melted from snow. They will not, however,
sell cold water melted from snow, as there are health concerns with this.
During lunch
time, you can order hot food. Find a menu or see the list of offerings
on the wall. Rösti (Swiss hash browns) are good, and when served
with cheese, or bacon (lardons or speck in French or German, respectively)
provide plenty of calories.
Thé
de marche (tea for walking)
Marche thé
is tea sold for the day's trip—marching tea. Different huts dispense
this in different ways, but in general, they will gather bottles and thermoses
the evening before and fill them the following morning. We'll pick up
the bottles in the morning before we leave. Marche thé is added
to the bill before we pay it in the evening. Bring your bottles to dinner
and we can in turn give them to the guardian after dinner for morning
filling.
Dinner
table assignments
In most
huts, especially if they are crowded, we will be assigned a table for
eating. This may not be the table we happen to be sitting at before dinner,
and we may have to move. The hut keepers do this in order to seat everyone.
Often they will put a note on the table indicating which party are to
sit at that table, and the number in the party.
Cleaning
up table
After dinner,
we are expected to carry dirty dishes back to the counter by the kitchen.
Usually the guide does this, but we can all pitch in if it seems appropriate.
When we are done with dessert we need to wipe down the table with the
cloth provided near the kitchen. We need to clean up the table, remove
garbage, and personal items, and finally wipe it down before we go to
bed. If you are the last of our group to leave the table (the guides,
in their exhaustion, have gone to bed early!) be sure it is clean and
clear when you turn in.
Usually
there is a recycling receptacle for aluminum cans, and often one for the
clear "PET" plastic bottles many drinks come in.
Hut keepers
dinner time
After the
skiers in the hut eat, the hut keepers take their dinner. Usually you
can ask for more drinks during this time, but keep your requests simple
so as not to too greatly interrupt their dinner.
Paying
the bill
After the
hut keepers finish eating their dinner and cleaning up the kitchen your
guide will settle up the bill for the night. This is when the tab gets
closed. Anything you want to buy after that time you need to pay for with
cash, at the time of purchase.
Ordering
breakfast and lunch
At some
point in the evening your guide needs to tell the hut keeper what sort
of drink you will want in the morning. The options usually are coffee,
tea or chocolate. Also, if you would like to order a packed lunch for
the day, we need to do this the evening before, before we close out the
tab. We often order a lunch if the next day is particularly long, but
otherwise a couple of candy bars (sold in all the huts) are generally
enough.
Getting
up in the morning
Departing
in the morning is often a rather hectic affair. This is especially so
when an early start is called for.
Usually,
the entire hut will get up at once. If some of the occupants of your room
choose to sleep in, try to be quiet when you get up.
The trick
in departing is to be ready with your pack already packed as much as is
possible before you go to bed. Be organized in the morning and everything
will go more easily.
The first
thing we do is to change into the clothes we will most likely use that
day (except for our outer shell jacket which we put on just before we
go outside. Keep these handy, by your bunk, so that you can get dressed
quickly.
After we
get out of the bunk, we fold the blankets. Some huts even post directions
as to exactly how they like you to fold your blankets. In any case, fold
them neatly and stack them and your pillow as you found them.
Do a last
check of your sleeping area to be sure you have not left anything under
a pillow, etc.
Put your
avalanche beacon on as you dress. Usually we wear it just on top of whatever
layer is next to our skin. Turn on your beacon when you put it on. Check
the battery indicator level.
Stuff your
belongings in your pack (you will be able to organize them better after
breakfast) and bring it and your basket (if you have one) downstairs. Find a place to stash your pack out of everyone's way,
and find your way to the breakfast table.
If you need
a bathroom stop, try to do this early, as the WC lines seem to get longer
as it gets later.
After breakfast
and the ritual wiping down and clearing of the table, we pack up our packs,
put on our boots and head outside.
Remember
that the vast majority of the time we will be wearing our harnesses all
day long so consider the donning of your harness to be part of getting ready
for the day. Make your last bathroom stop before you put on your harness.
Also remember
to pick up your ice axe, crampons, and anything else you left in the foyer.
Think about whatever you left in various parts of the hut, and be sure
you have them with you. If you left something up in the dorm room you
will need to take off your boot shells to go looking for it. The hut keepers
don't like guests to wear boot shells in the dorms or upstairs.
Skins may
or may not go on the skis, depending on whether or not we are starting
with an uphill. Your guide will advise you. Once we are all outside, the guides will do a quick
transceiver check to be sure everyone is transmitting before we start.
|
